ShellScriptでハイパーテクニックする
はじめに
この記事は今年イチ!お勧めしたいテクニック by ゆめみ feat.やめ太郎 Advent Calendar 2019の20日目の記事です。
今年は「お勧めテクニック」ということで、業務効率化ッ!!を盾に業務時間の30%はShellScript遊びに当てている私にピッタリな企画ですね、ありがとうございます。
今回は業務でよく使うツールを、ShellScriptでハイパーテクニックする方法をいくつかご紹介。
今回紹介するコードは全部Githubにあげているので実際に試したい人はどうぞ。
ハイパーテクニックする対象
- GoogleChrome
- iTerm2
- SequelPro
GoogleChrome
ブラウザに移動せずTerminalで自在にタブ移動する
Web開発をしているとTerminalとブラウザを行ったり来たりすることが多い。
一々ブラウザに移動してからタブ選択、なんてことはせずにTerminalで全部やっちゃいましょう。
コード▼
#!/usr/bin/env bash

function getTabs() {
osascript << EOF
    set _output to ""
    tell application "Google Chrome"
        set _window_index to 1
        repeat with w in windows
            set _tab_index to 1
            repeat with t in tabs of w
                set _title to get title of t
                set _url to get URL of t
                set _output to (_output & _window_index & "\t" & _tab_index & "\t" & _url & "\t" & _title & "\n")
                set _tab_index to _tab_index + 1
            end repeat
            set _window_index to _window_index + 1
            if _window_index > count windows then exit repeat
        end repeat
    end tell
    return _output
EOF
}

function setActiveTab() {
local _window_index=$1
local _tab_index=$2
osascript -- - "$_window_index" "$_tab_index" << EOF
on run argv
    set _window_index to item 1 of argv
    set _tab_index to item 2 of argv
    tell application "Google Chrome"
        activate
        set index of window (_window_index as number) to (_window_index as number)
        set active tab index of window (_window_index as number) to (_tab_index as number)
    end tell
end run
EOF
}

function main() {
    local selected
    IFS=$'\t' read -r -a selected < <(
        getTabs | sed '/^$/d' | fzf --delimiter $'\t' --with-nth 4 --preview 'echo {3}' --preview-window down:1 "$@"
    )
    [ ${#selected[@]} -lt 2 ] && return 130

    setActiveTab ${selected[0]} ${selected[1]}
}

main "$@"
てっとり早く試したいという方はbrewからインストールできます。
$ brew tap Rasukarusan/tap
$ brew install Rasukarusan/tap/fzf-chrome-active-tab

# 実行
$ chrome-tab-activate
ここでお勧めしたいのは、AppleScriptはヒアドキュメントでShellScript内に埋め込むことができることです。ヒアドキュメントでShellScriptに埋め込むことによって、
- 成果物がShellファイル1つになる
- Git管理しやすい(AppleScriptの.scpt拡張子だとバイナリになってしまう)
- ヒアドキュメント内でShell変数($1など)が使える
といった恩恵を受けれます。
特に「ヒアドキュメント内でShell変数($1など)が使える」はAppleScriptと非常に相性が良いです。今回は「引数も渡せるよ」ということを示すために下記のようにしていますが、
local _window_index=$1
osascript -- - "$_window_index" << EOF
on run argv
    set _window_index to item 1 of argv
    set index of window _window_index
end run
EOF
ヒアドキュメント内で直接変数を埋め込むことで、ShellScriptからAppleScriptへの引数の受け渡しが不要になります。
local _window_index=$1
osascript << EOF
    set index of window ${_window_index}
EOF
on run argvやitem 1 of argvなど一々書かずに済むのでとてもシンプルにできますね。^ ^
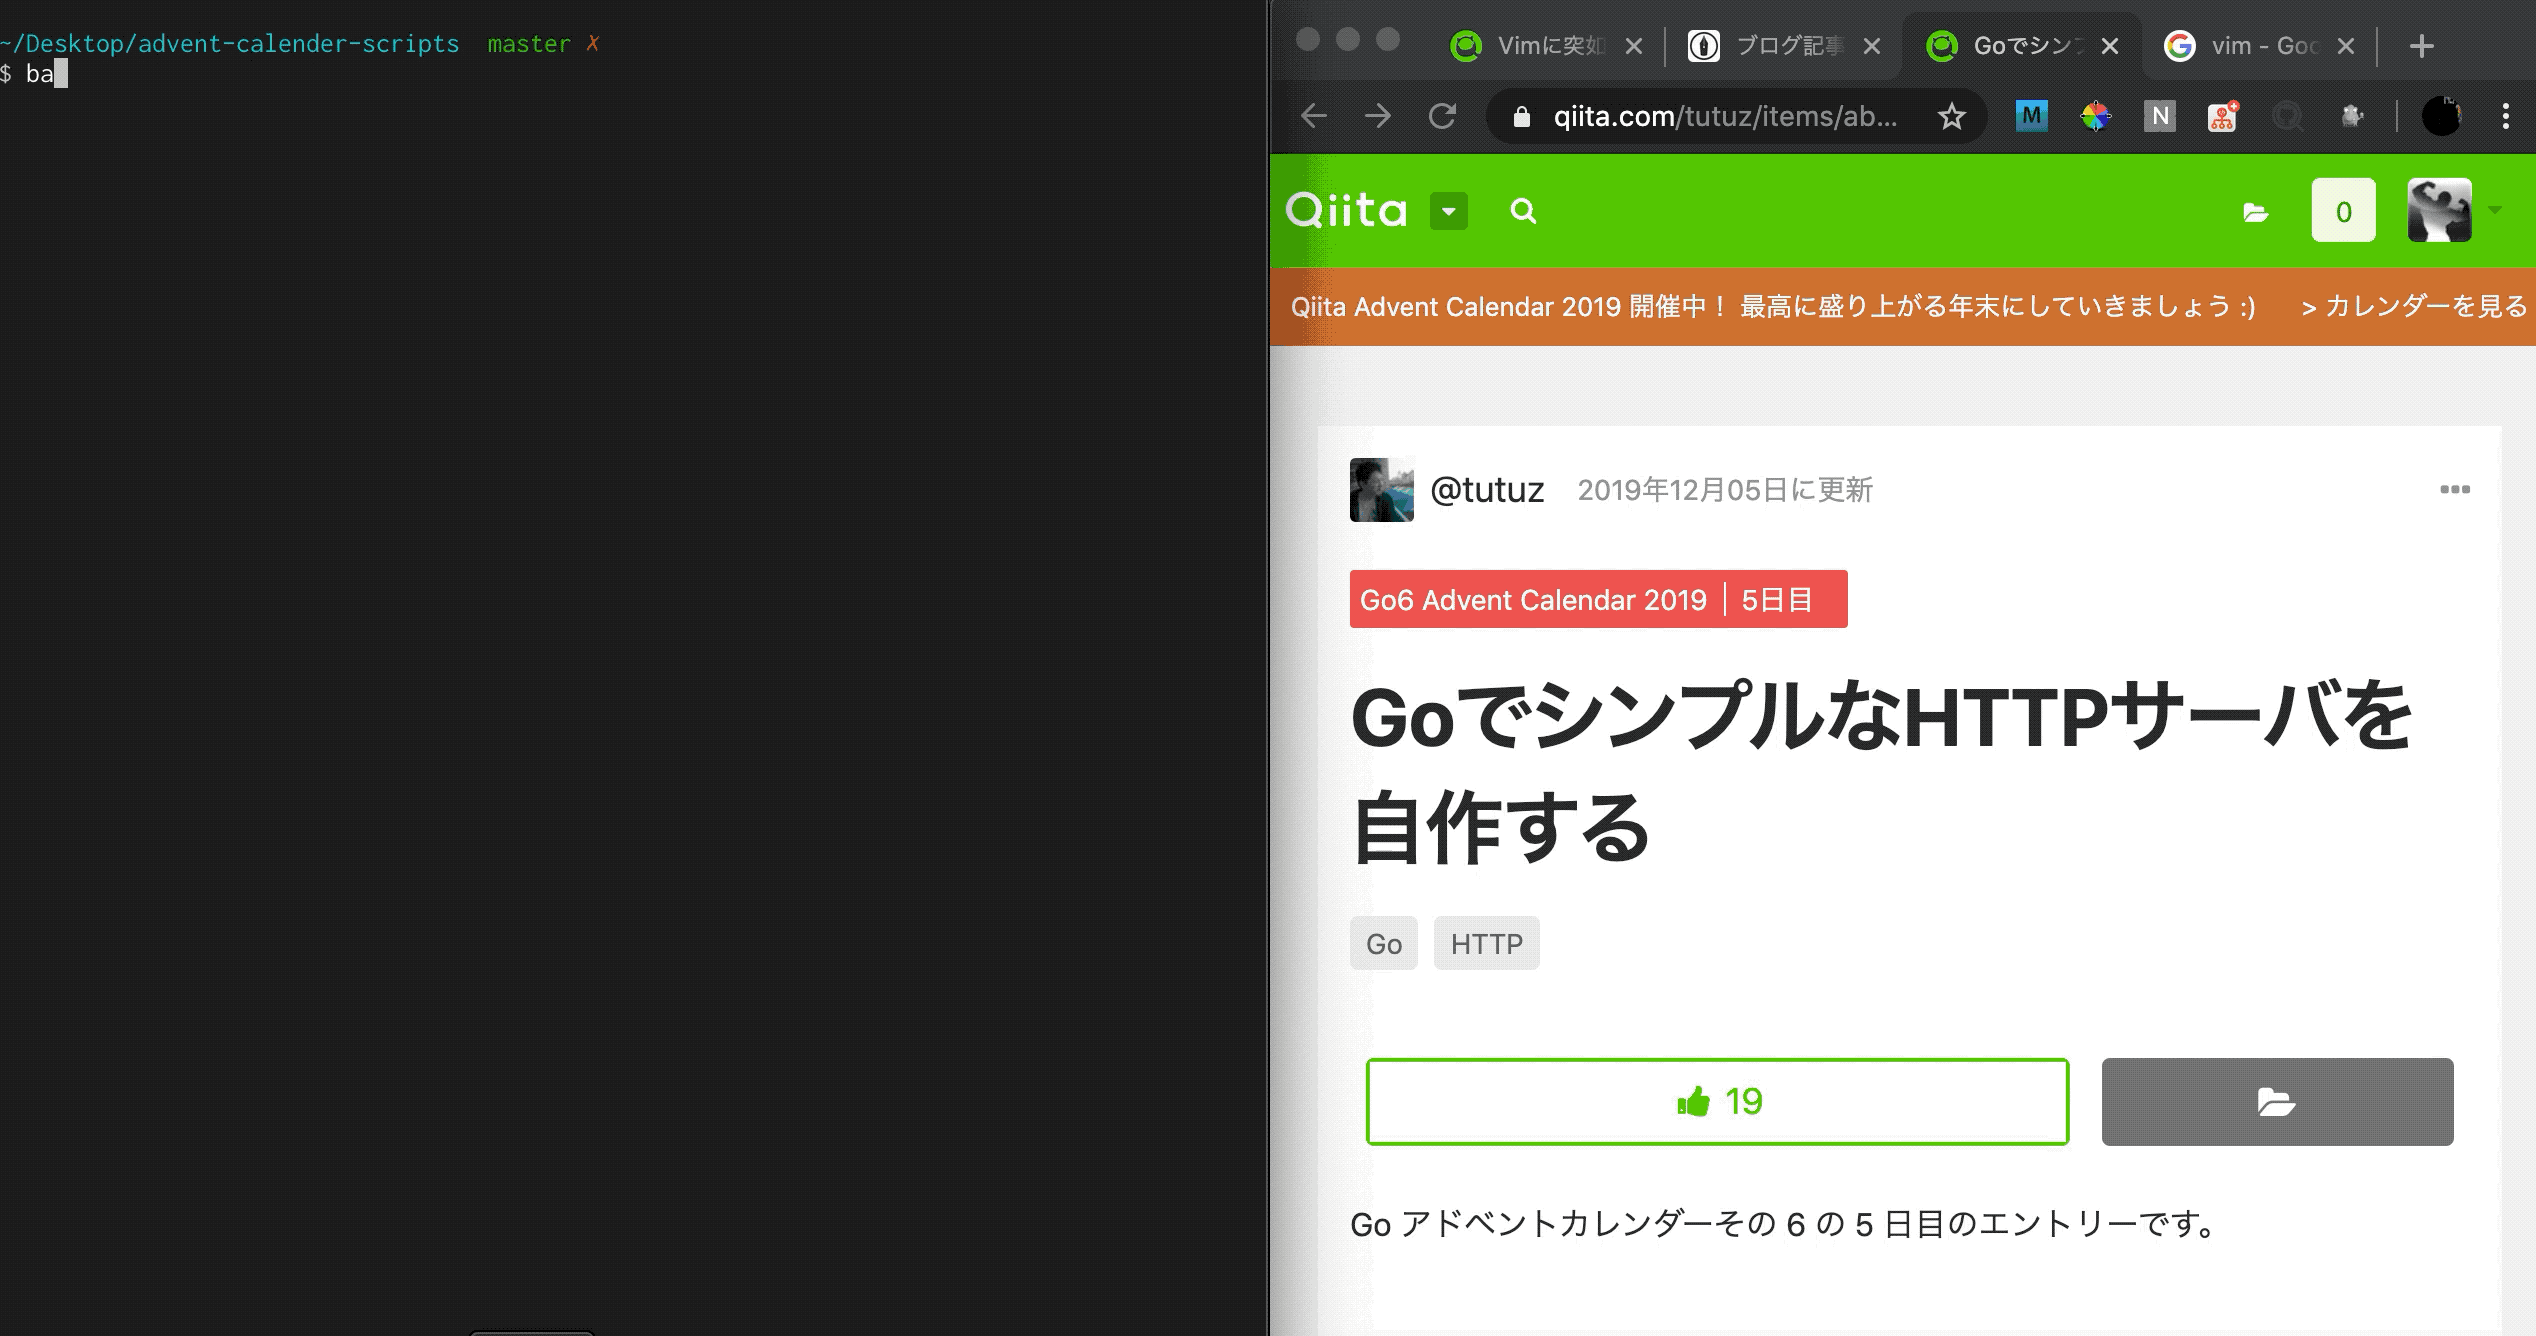
Chromeの履歴を一覧表示して開く
これは「今日何やってたっけな」とか「さっき開いてたページ何だっけ」となった場合に便利です。これはfzfインストールした人ならまずやりたいことの1つだと思うので、結構やってる人いそうですね。
コード▼
#!/usr/bin/env bash

#
# Chromeの履歴をfzfで選択して開く
# sh chrome_history.sh [PATTERN]
#

function export_chrome_history() {
    # Chromeを開いているとdbがロック状態で参照できないので、コピーしたものを参照する
    cp ~/Library/Application\ Support/Google/Chrome/Default/History ~/
    local SQL="
    SELECT
        url,
        title,
        DATETIME(last_visit_time / 1000000 + (strftime('%s', '1601-01-01') ), 'unixepoch', '+9 hours') AS date
    FROM
        urls
    GROUP BY
        title
    ORDER BY
        date DESC
    LIMIT
        10000 ;
    "
    sqlite3 ~/History -cmd '.mode tabs' "$SQL"
}

function show_chrome_history() {
    local filter=${1:-""}
    local chrome_history=$(export_chrome_history)
    local selected=$(
        echo "\texport\n$chrome_history" \
        | grep -P "(\texport|$filter)" \
        | awk '!title[$2]++' \
        | fzf --delimiter $'\t' --with-nth 2,3 --preview 'w3m -dump {1}'\
        | tr -d '\n'
    )
    [ -z "$selected" ] && return
    # 'export'を選択した場合、ページは開かず端末に全てを出力する
    if [ "$(/bin/echo -n "$selected" | tr -d ' ')" = 'export' ]; then
        echo "$chrome_history" | awk -F '\t' '{print $3"\t"$2}'
        return
    fi
    open $(echo $selected | awk '{print $1}')
}

function show_by_date() {
    local chrome_history=$(export_chrome_history)
    # 表示したい日付を選択する
    local select_date=$(
        echo "$chrome_history" \
        | awk -F '\t' '{print $3}' \
        | awk -F ' ' '{print $1}' \
        | grep -P '^[0-9]{4}-.*' \
        | sort -ur \
        | xargs -I {} gdate '+%Y-%m-%d (%a)' -d {} \
        | fzf
    )
    [ -z "$select_date" ] && return
    show_chrome_history $select_date
}

function main() {
    if [ "$1" = '-d' ]; then
        show_by_date
    else
        show_chrome_history $1
    fi
}

main $1
Chromeは~/Library/Application\ Support/Google/Chrome/Default/に履歴やらブックマークやらの情報が格納されているので色々いじり甲斐がありますよね。
今回はpreview内でw3mを実行しページの概要を表示していますが、リクエストを投げる分少々重くなるのでpreviewにはURLを表示する形でもグッド。
iTerm2
画面分割、新タブ作成、ブロードキャスト入力もコマンドで実行する
iTerm2にはCmd+tで新規タブを開いたりCmd+dで縦分割したりと、便利なキーショートカットがたくさんあります。普段使いではキーで実行すればいいのですが、一連の作業を自動化する際はコマンドで実行出来たほうが何かと便利です。
下記は「新タブ作成 → ssh実行 → 画面分割 → ブロードキャスト入力ON」の一連の作業を自動で行っています。
tmuxのほうがスマートにできるって言う人はちょっと黙っていましょうね
コード▼
#!/usr/bin/env bash

function create_new_tab() {
osascript << EOF
tell application "iTerm"
  tell current window
      create tab with default profile
  end tell
end tell
EOF
}

function send_command() {
osascript -- - "$1" << EOF
on run argv
set _command to item 1 of argv
tell application "iTerm"
  tell current window
      tell current session
          write text _command
      end tell
  end tell
end tell
end run
EOF
}

function split_vertically() {
osascript << EOF
tell application "iTerm"
  tell current window
      tell current session
          select (split vertically with default profile)
      end tell
  end tell
end tell
EOF
}

function split_horizontally() {
osascript << EOF
tell application "iTerm"
  tell current window
      tell current session
          select (split horizontally with default profile)
      end tell
  end tell
end tell
EOF
}

function broadcast_input() {
osascript << EOF
tell application "iTerm"
  activate
  tell application "System Events"
      tell application process "iTerm2"
          tell menu "Shell" of menu bar item "Shell" of menu bar 1
              tell menu "Broadcast Input" of menu item "Broadcast Input"
                  click menu item "Broadcast Input to All Panes in Current Tab"
              end tell
          end tell
      end tell
  end tell
end tell
EOF
}

function select_session_by_id() {
osascript -- - "$1" << EOF
on run argv
set _session_id to item 1 of argv
tell application "iTerm"
  tell session id _session_id of current tab of current window
      select
  end tell
end tell
end run
EOF
}

function get_current_session_id() {
osascript << EOF
tell application "iTerm"
  tell current session of current tab of current window
      id
  end tell
end tell
EOF
}

function get_current_columns() {
osascript << EOF
tell application "iTerm"
  tell current session of current tab of current window
      columns
  end tell
end tell
EOF
}

function multi_ssh_split() {
    create_new_tab
    local max_panel_count=3
    local width=$(get_current_columns)
    local min_width=$(expr ${width} / ${max_panel_count})

    local target_servers=($@)
    local servers_count=$#
    local row=$(expr $servers_count / $max_panel_count)
    local session_ids=(`get_current_session_id`)

    [ `expr $servers_count % $max_panel_count` -eq 0 ] && row=$(expr $row - 1)

    # split horizontally and store a session id
    while [ $row -gt 0 ];do
        split_horizontally
        row=$(expr $row - 1)
        session_ids=(${session_ids[@]} `get_current_session_id`)
    done

    # select first pane
    select_session_by_id ${session_ids[$row]}
    send_command "printf '\e]1337;SetBadgeFormat=%s\a' $(/bin/echo -n ${target_servers[0]} | base64)"
    send_command "ssh ${target_servers[0]}"
    [ $servers_count -eq 1 ] && return

    # -1 is that because ssh first-server via first pane
    local vertical_cell_count=$(expr ${servers_count} - 1)

    # split vertically and ssh
    for i in `seq $vertical_cell_count`; do
        if [ `get_current_columns` -lt $min_width ];then
            row=$(expr $row + 1)
            select_session_by_id ${session_ids[$row]}
        else
            split_vertically
        fi
        send_command "printf '\e]1337;SetBadgeFormat=%s\a' $(/bin/echo -n ${target_servers[$i]} | base64)"
        send_command "ssh ${target_servers[$i]}"
    done
    broadcast_input
}

main() {
    local target_servers=$(cat ~/.ssh/config | grep 'Host ' | sed 's/Host //g' | fzf)
    [ -z "$target_servers" ] && return 130
    multi_ssh_split ${target_servers[@]}
}
main >/dev/null
ほとんど全てのキーショートカットはAppleScriptで代用できます。
例えば「新タブ作成→画面分割」をやりたかったら以下のように小さい関数にまとめておくと再利用&コマンド実行可能なのでお勧めです。
#!/usr/bin/env bash

function create_new_tab() {
osascript << EOF
tell application "iTerm"
  tell current window
      create tab with default profile
  end tell
end tell
EOF
}

function split_vertically() {
osascript << EOF
tell application "iTerm"
  tell current window
      tell current session
          select (split vertically with default profile)
      end tell
  end tell
end tell
EOF
}

# 新タブ作成して画面分割
create_new_tab
split_vertically
※ AppleScriptでkeystroke "t" using {command down}のようにして新タブ作成のCmd+tを実現してもいいですが、人によってはキーマップを変更していることもあるので、素直にiTermに命令していくほうが汎用性は高いです。
このような関数を.zshrc等にまとめておくと色々な場面で使えて便利です。
または~/iterm.shかなんかに関数をまとめておいて、.zshrc等にsource ~/iterm.shと記述しておくとまとまりがあっていいですね ^ ^
気軽に背景色を変える
背景色を変えたいときってありますよね。隣の人の目をチカチカさせたいときなどにも使えます。
コード▼
#!/usr/bin/env bash

function get_current_background_color() {
osascript << EOF
tell application "iTerm"
    activate
    tell current session of current window
        return background color
    end tell
end tell
EOF
}

function change_background_color() {
local r=$(echo "scale=2; ($1/255) * 65535" | bc)
local g=$(echo "scale=2; ($2/255) * 65535" | bc)
local b=$(echo "scale=2; ($3/255) * 65535" | bc)
osascript -- - $r $g $b << EOF
on run argv
    tell application "iTerm"
        activate
        tell current session of current window
            set red to (item 1 of argv)
            set green to (item 2 of argv)
            set blue to (item 3 of argv)
            set background color to {red, green, blue, 1}
        end tell
    end tell
end run
EOF
}

# my colors
function print_colors_rgb() {
    local colors=(
        # "color_name R G B"
        "Black     0    0   0",
        "Red     201   27   0",
        "Green     0  194   0",
        "Yellow  199  196   0",
        "Blue      2   37 199",
        "Magenda 201   48 199",
        "White     0  197 199",
    )
    echo ${colors[@]} | tr ',' '\n' | sed 's/^ //g'
}

function main() {
    local current_color
    IFS=',' read -a current_color < <(get_current_background_color)
    local current_color_rgb=(
        $(echo "scale=2;(${current_color[0]}/65535)*255" | bc)
        $(echo "scale=2;(${current_color[1]}/65535)*255" | bc)
        $(echo "scale=2;(${current_color[2]}/65535)*255" | bc)
    )

    local color
    read -r -a color < <(
        print_colors_rgb | fzf --delimiter=" " --with-nth 1 --bind "ctrl-p:execute-silent($0 {2} {3} {4})"
    )

    if [ -z "$color" ];then
        $0 ${current_color_rgb[@]}
    else
        $0 ${color[@]:1:3}
    fi
}

if [ $# -eq 0 ];then
    main
else
    change_background_color $@
fi
ポイントはfzfの--bind機能でENTERを押さなくてもCtrl-pで色を変えられるようにするところです。一々選択していたら相手に休憩時間を与えてしまいます。
これ実際に会社でやったら隣の先輩が「うぐっ!ぐ、ぐぁあああコポォ!」とリアルに反応してくれたので作った甲斐がありました。ごめんなさいね ^ ^
透明度も自在に変更する
色を変えるなら当然透明度も変えたくなりますね。
Ctrl-pで透明度をプレビューしながら設定する
コード▼
#!/usr/bin/env bash

function change_transparency() {
osascript -- - $1 << EOF
on run argv
    tell application "iTerm"
        activate
        tell current session of current window
            set transparency to (item 1 of argv as number)
        end tell
    end tell
end run
EOF
}

function main() {
    local transparency=$(seq -f "%.1f" 0.0 0.1 1 \
        | fzf --header 'transparency' --bind "ctrl-p:execute-silent($0 {})")
    [ -z "$transparency" ] && return
    change_transparency $transparency
}

if [ $# -eq 0 ];then
    main
else
    change_transparency $@
fi
先程の色変えでも実装していましたが、fzfの--bindで下記のように自分自身($0)を呼び出すことで若干テクニカルさを醸し出しています。
local transparency=$(seq -f "%.1f" 0.0 0.1 1 \
    | fzf --header 'transparency' --bind "ctrl-p:execute-silent($0 {})")
...略

if [ $# -eq 0 ];then # スクリプト実行時はこっちに入る
    main
else # --bind "ctrl-p:execute-silent($0 {})"で実行するときはこっち
    change_transparency $@
fi
つまりfzfに入らず外からも実行可能にしてるよってことですね。
$ ./iterm_transparency.sh # fzfで選択しながら実行
$ ./iterm_transparency.sh 0.5 # 透明度を直接指定して実行
バッジを設定する
iTerm2のバッジ機能、皆さんご存知でしょうか。
設定 > Profiles からも設定できますが、コマンドでも設定可能です。
![]()
function _set_badge() {
    printf "\e]1337;SetBadgeFormat=%s\a" $(/bin/echo -n "$1" | base64)
}
alias ba='_set_badge'
sshするときにホスト名を表示とかに便利です。 ※ tmuxを起動していると表示されないので注意。
SequelPro
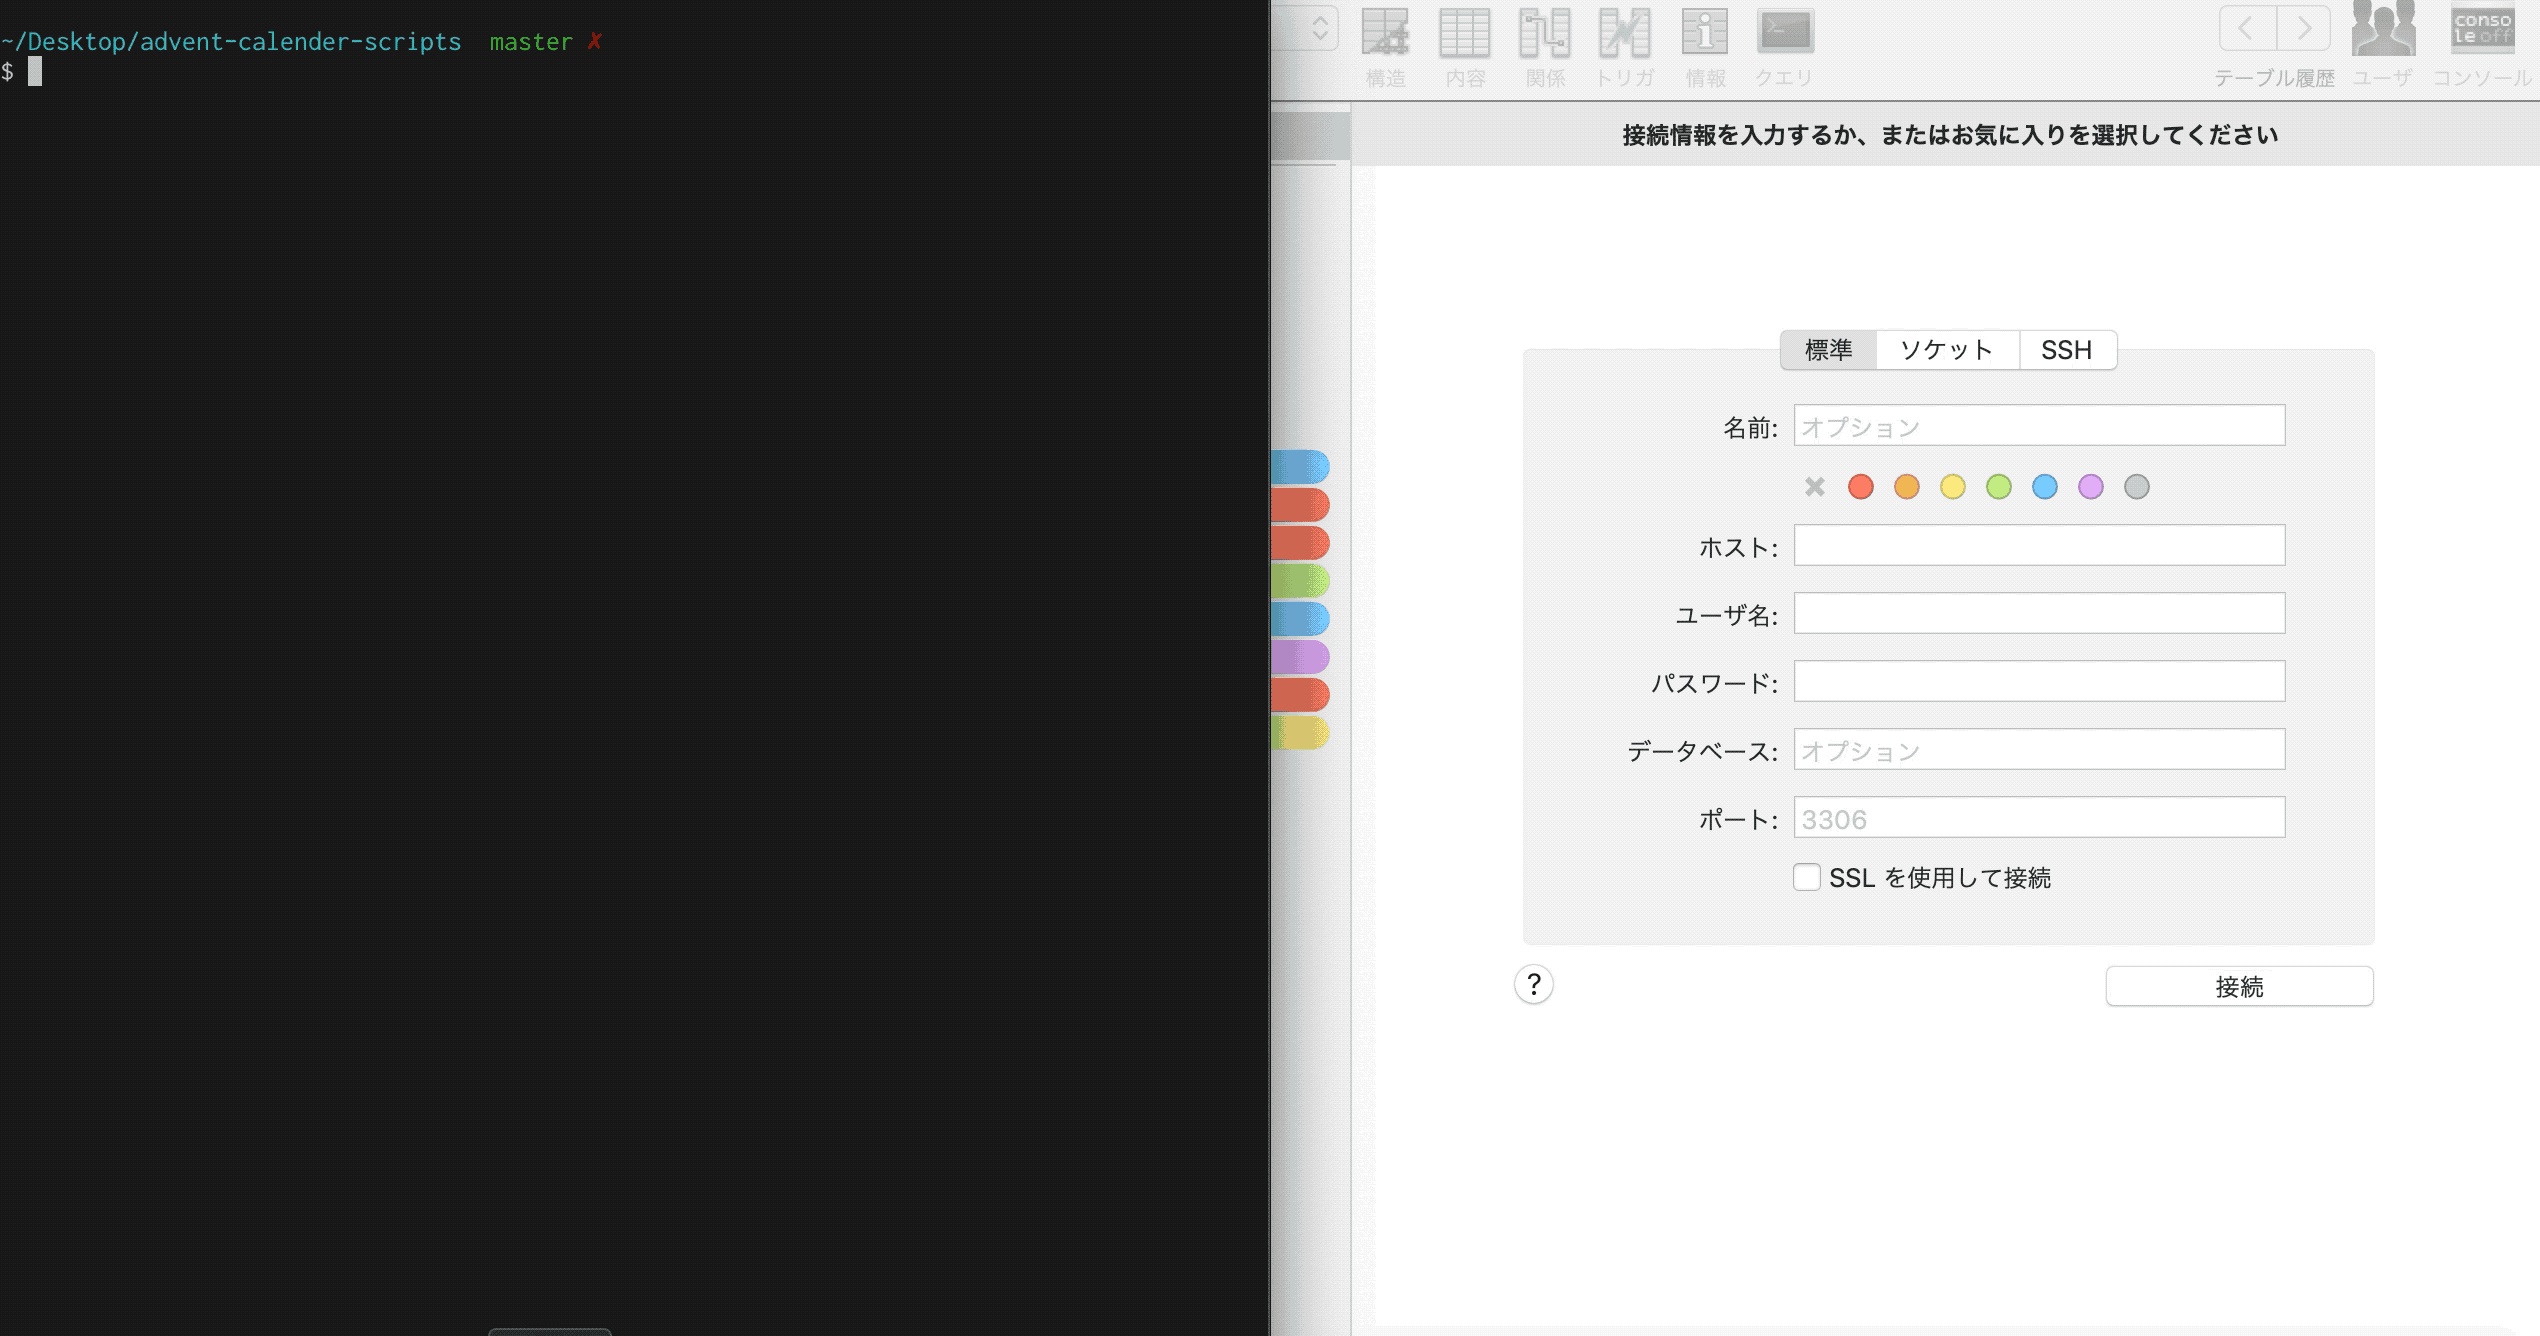
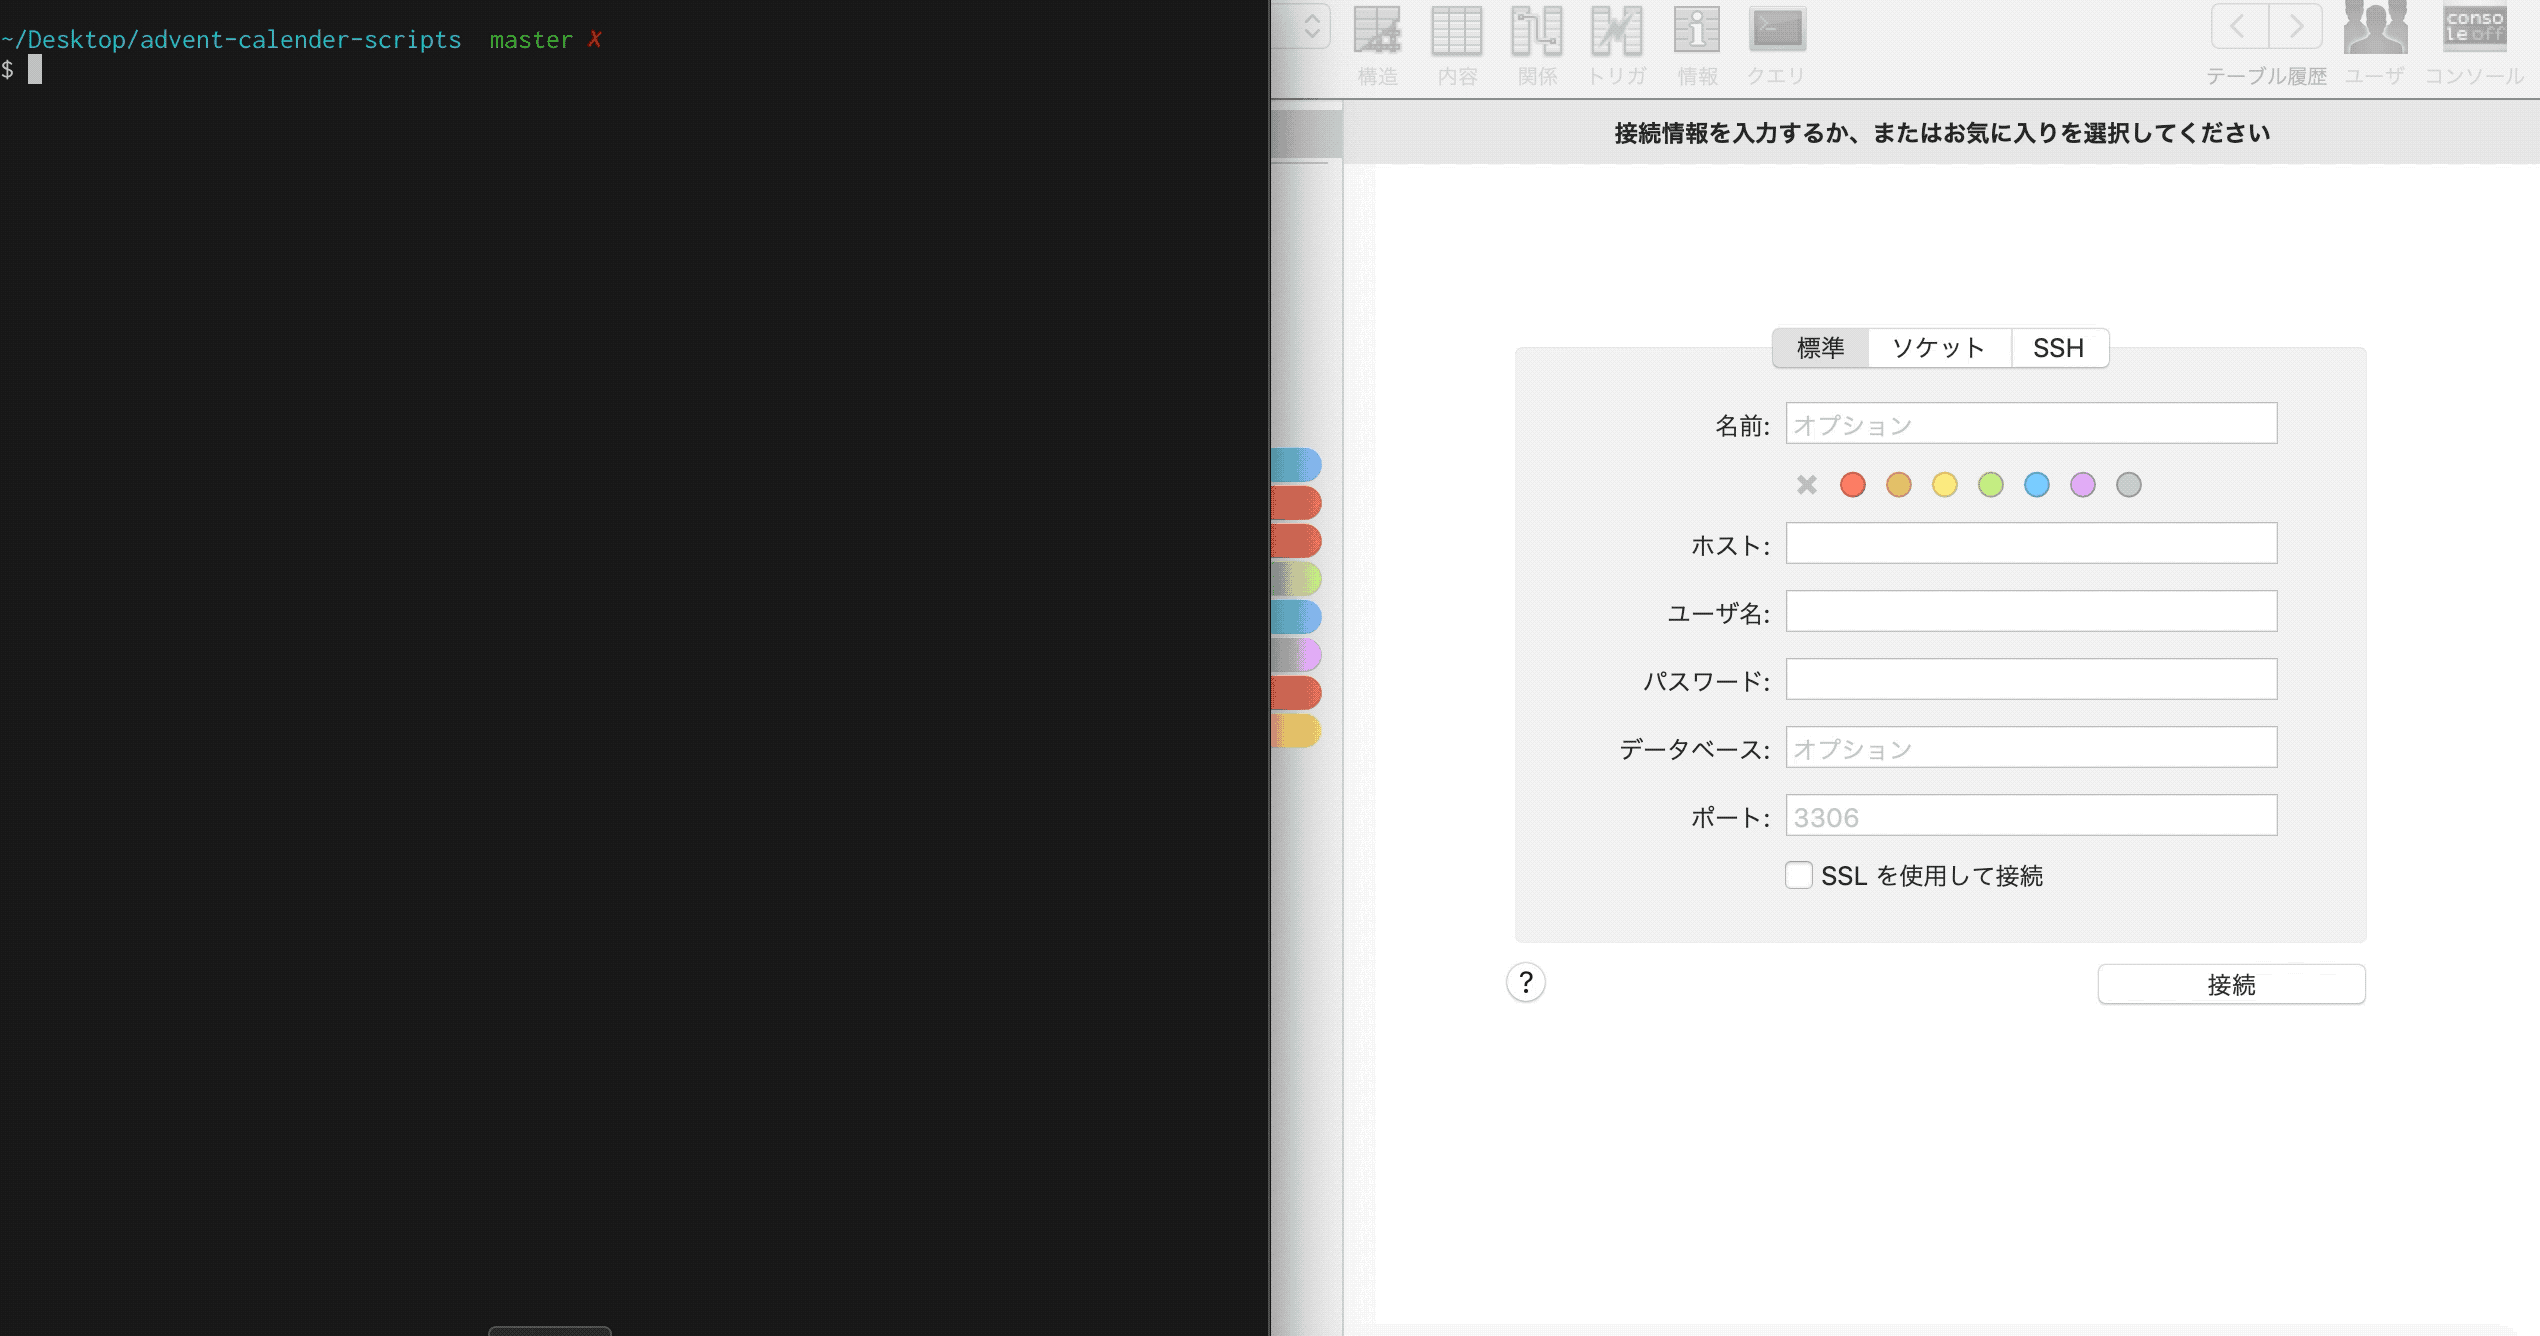
「お気に入り」から複数選択して自動で接続する
Sequel ProはUIもイケてて非常に便利ですが、接続するときに「お気に入り」から選択するのが億劫なんですよね。
フィルタリングしながら選択したいときや一度に複数接続したいときに便利です。
コード▼
#!/usr/bin/env bash

#
# SequelProで指定した接続を開く
# 引数にはSequelProの「お気に入り」の行番号を示すインデックスが入る
#
function connect() {
osascript -- - "$@" << EOF
on run argv
tell application "Sequel Pro"
    activate
    delay 0.5
    tell application "System Events"
        tell process "Sequel Pro"
            set frontmost to true
            delay 0.5
            repeat with i from 1 to (count argv)
                keystroke "t" using {command down}
                tell window "Sequel Pro"
                    delay 0.5
                    tell outline 1 of scroll area 1 of splitter group 1 of group 2
                        # because row1 is "QUICK CONNECT" and row2 is "FAVORITES", the top of favorites is row3.
                        set _row_index to (item i of argv as number) + 2
                        select row _row_index
                    end tell
                    tell scroll area 2 of splitter group 1 of group 2
                        click button 2
                    end tell
                end tell
            end repeat
        end tell
    end tell
end tell
end run
EOF
}

function main() {
    local favorites=$(plutil -convert json ~/Library/Application\ Support/Sequel\ Pro/Data/Favorites.plist -o - \
        | jq -r '."Favorites Root".Children[].name')
    local targets=($(echo "${favorites}" | fzf))
    local rows=()
    for target in ${targets[@]}; do
        echo $target
        local row=$(echo "${favorites}" | grep -n ${target} | cut -d ':' -f 1)
        rows=(${rows[@]} $row)
    done
    [ ${#rows[@]} -eq 0 ] && return 130
    connect ${rows[@]} >/dev/null
}

main
ここでイチオシしたいのは「お気に入り」一覧を取得する箇所のplutilコマンドです。Macには標準でインストールされています。
local favorites=$(plutil -convert json ~/Library/Application\ Support/Sequel\ Pro/Data/Favorites.plist -o - \
    | jq -r '."Favorites Root".Children[].name')
Macではよく見るplistファイルですが、plutilコマンドでjson化することが出来ます。
また、-oの引数に通常は出力ファイル名を指定しますが-を指定することで標準出力しています。
# ファイルに保存せずstdoutする
$ plutil -convert json ~/Library/Application\ Support/Sequel\ Pro/Data/Favorites.plist -o - | jq
{
  "Favorites Root": {
    "IsExpanded": true,
    "Name": "お気に入り",
    "Children": [
      {
        "sslCACertFileLocation": "",
        "host": "127.0.0.1",
        "database": "docker",
        ...
あとはjqでいかようにもできるのでべりぃイージーですね。
ワンタイムパスがあるDBでも自動入力で接続する
DB情報を「お気に入り」に固定化できない場合に便利です。DBパスなどがワンタイムパスになっており、コマンド等で取得するときなどにテクニカルできます。
引数に入力項目を渡せば自動で入力してくれます。
コード▼
#!/usr/bin/env bash

function connect() {
local name=$1
local host=$2
local username=$3
local password=$4
local database=$5
local port=$6

osascript << EOF
tell application "Sequel Pro"
    activate
    delay 0.5
    tell application "System Events"
        tell process "Sequel Pro"

            # 新規タブ作成
            set frontmost to true
            keystroke "t" using {command down}

            tell window "Sequel Pro"
                # 「クイック接続」をクリック
                tell outline 1 of scroll area 1 of splitter group 1 of group 2
                    select row 1
                end tell

                # DB情報を入力
                tell tab group 1 of scroll area 2 of splitter group 1 of group 2
                    # 名前
                    set focused of text field 5 to true
                    keystroke "${name}"
                    key code 100

                    # MySQLホスト
                    delay 0.3
                    set focused of text field 6 to true
                    keystroke "${host}"
                    key code 100

                    # ユーザ名
                    delay 0.3
                    set focused of text field 4 to true
                    keystroke "${username}"
                    key code 100

                    # パスワード
                    delay 0.3
                    set focused of text field 3 to true
                    keystroke "${password}"
                    key code 100

                    # データベース
                    delay 0.3
                    set focused of text field 2 to true
                    keystroke "${database}"
                    key code 100

                    # ポート
                    delay 0.3
                    set focused of text field 1 to true
                    keystroke "${port}"
                    key code 100
                end tell

                # 接続
                tell scroll area 2 of splitter group 1 of group 2
                     click button 2
                end tell
            end tell
        end tell
    end tell
end tell
EOF
}

function main() {
    # DB情報はコマンドで取得して渡す想定
    local name='docker1'
    local host='127.0.0.1'
    local username='docker'
    local password='docker'
    local database='testdb'
    local port='13306'
    connect $name $host $username $password $database $port >/dev/null
}
main
set focused of text field 番号 to trueで各テキストフィールドにフォーカスを当てて入力していますが、このテキストフィールドは上から1,2,3...のように連番になっていないので注意です。各テキストフィールドの割当は以下のようになっています。
# 標準タブの場合
text field 1 to true --ポート
text field 2 to true --データベース
text field 3 to true --パスワード
text field 4 to true --ユーザ名
text field 5 to true --名前
text field 6 to true --ホスト

# SSHタブの場合
text field 1 to true --名前
text field 2 to true --SSHポート
text field 3 to true --SSHパスワード
text field 4 to true --SSHユーザ
text field 5 to true --SSHホスト
text field 6 to true --ポート
text field 7 to true --データベース
text field 8 to true --パスワード
text field 9 to true --ユーザ名
text field 10 to true --MySQLホスト
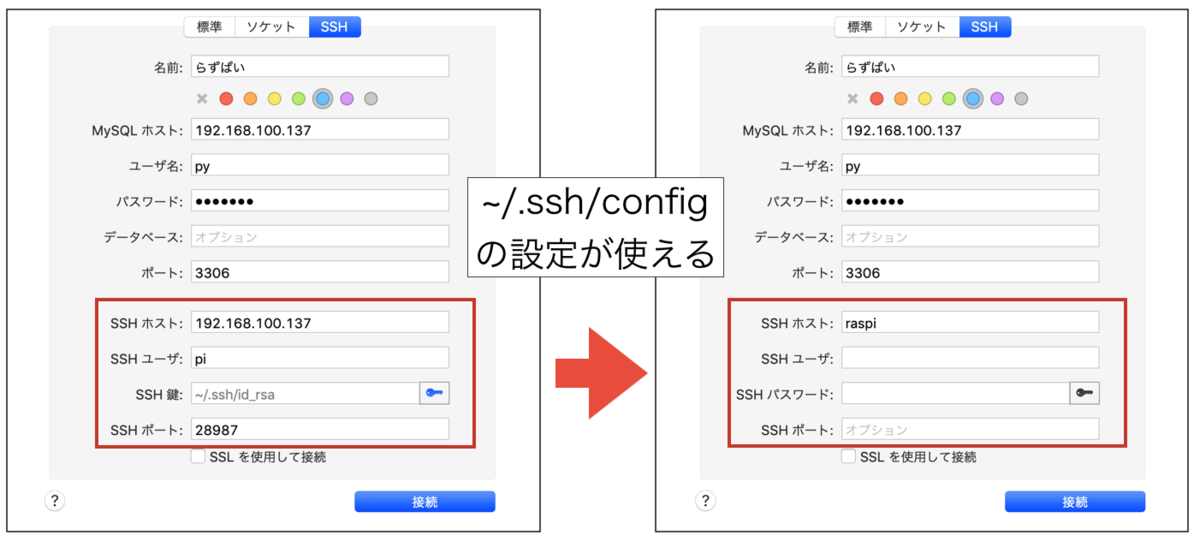
[Tips] Sequel Proでは~/.ssh/configの設定が使える
これはテクニックとはちょっと違うのですが、Sequel Proは~/.ssh/configに設定した内容を使えます。
例えば下記のように~/.ssh/configに設定があるとすると、
Host raspi
    HostName 192.168.100.137
    User pi
    Port 28987
    IdentityFile ~/.ssh/id_rsa
    ServerAliveInterval 20
Sequel Proではraspiと記述するだけで接続できます。
おまけ
たまにデスクトップのアイコン全部消したくなるときありますよね。 表示・非表示はコマンドで実行できるのでGIF動画撮るときなどに便利です。
![]()
※ 非表示になっているだけでファイルは消えないので安心していきましょう
# デスクトップ上アイコンの表示/非表示を切り替える
function toggle_desktop_icon_display() {
    local isDisplay=$(defaults read com.apple.finder CreateDesktop)
    if [ $isDisplay -eq 1 ]; then
        defaults write com.apple.finder CreateDesktop -boolean false && killall Finder
    else
        defaults write com.apple.finder CreateDesktop -boolean true && killall Finder
    fi
}
alias dt='toggle_desktop_icon_display'
終わり
業務効率化と称した自作スクリプト作りめちゃくちゃ楽しいですよね ^ ^
今回紹介したものがピンポイントで使えなくても、「もしかしてこういう使い方もできるんじゃない?」とか「別のアプリでこの考え方適用させたらもっと面白いんじゃない?」とか皆さんの中で色々アイデアが広がるようなものだったらこれ幸い。
何かに特化したテクニックとかも勿論好きだが、自分の中でもっともっと広げられるようなテクニックだとアドレナリンが止まらなくなる。エンジニアの醍醐味ですよね。
今年のアドベントカレンダーもとっても楽しいテーマで感謝です!